Tutorial
Entering a Route
Aviator Assistant offers several methods for plotting a route. This tutorial walks you through entering a route using the most commonly used flows, step by step.
Entering a Route
There are multiple ways you can enter a route. Below we will go over the different methods to enter a route.
1. - Entering a route using Route Manager (RM)
Entering routes via Route Manager will be the most commonly used method.
A. - Accessing the Route Manager (RM)

i. - To access the Route Manager, look for the RM button on the top left of the screen. This will open the Route Manager modal.
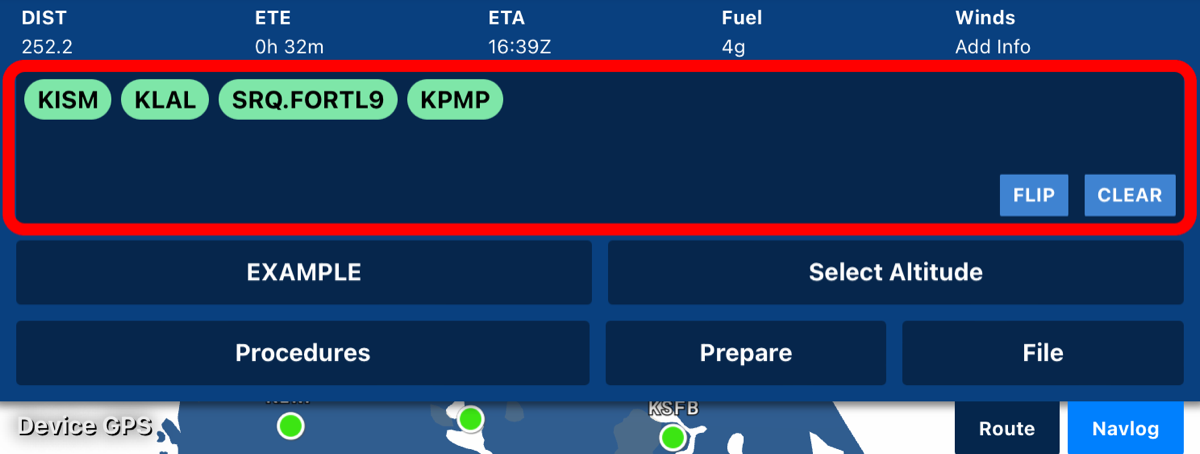
B. - Entering a route into the Route Manager
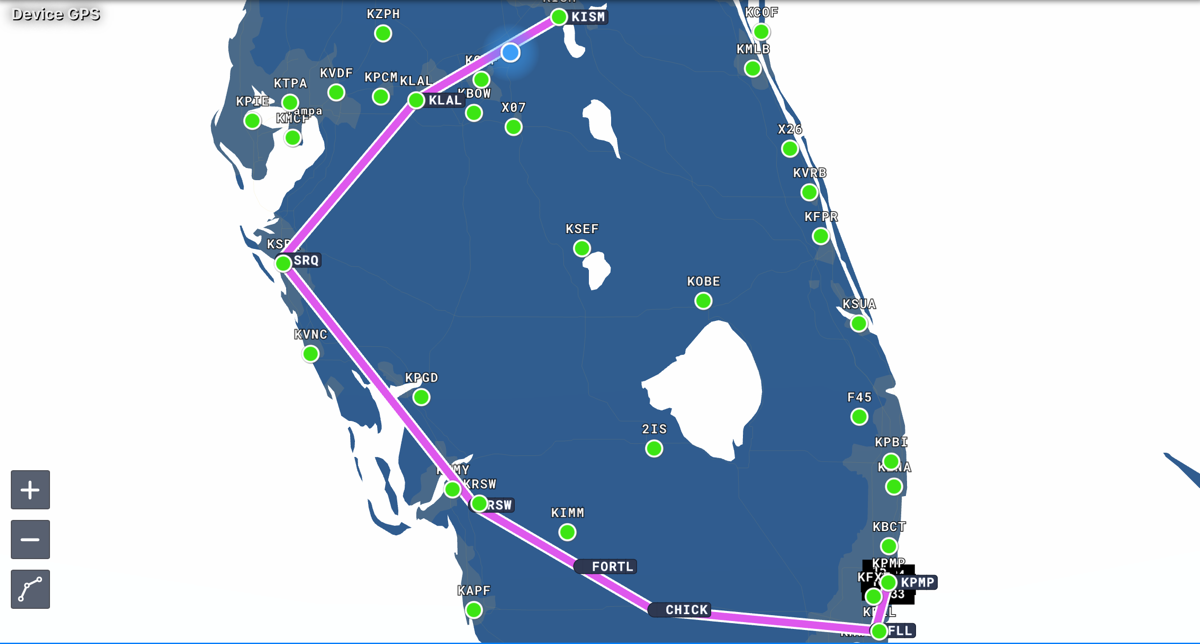
i. - Inside the route window, you can enter a location identifier, ICAO code, waypoint, and even arrivals via the appropriate base transition. In the example above, we have entered KISM LAL(KLAL), the approach SRQ.FORTL9 (FORTL Nine via base station SRQ) into KPMP. The above image shows our route entered into the Route Manager, the image below shows this route on our map after being entered.
2. - Entering a route using the Search Bar
A. - Accessing the Search Bar

i. - To access the Search Bar, look for the search field at the top center of the screen.
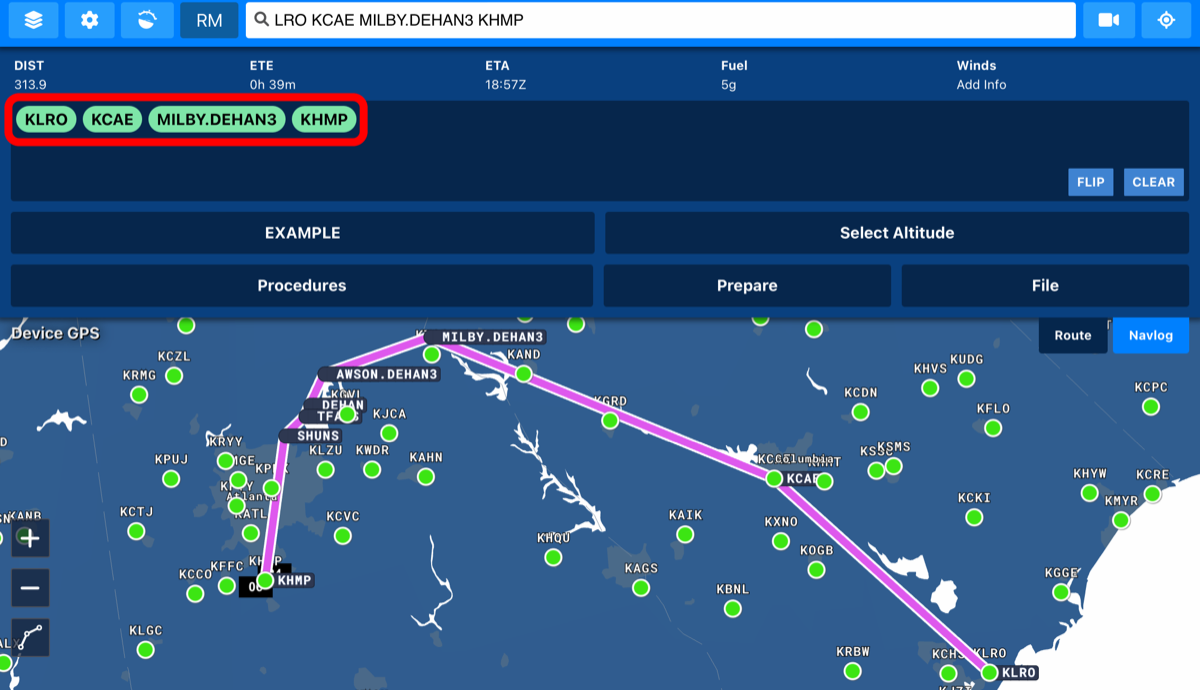
B. - Entering a route using the Search Bar
i. - Inside the search bar you can enter a location identifier, ICAO code, waypoint, and even arrivals via the appropriate base transition. In the example above, we enter LRO (KLRO), KCAE, MILBY.DEHAN3 (DEHAN Three approach via base station MILBY), into KHMP.

ii. - If everything is entered correctly, at the top of the search results, you will see a result with the waypoint icon on the left of the result. Clicking on this result will import it into the Route Manager as well as on the map (see image below).
3. - Entering a route using Airport Information
A. - Accessing Airport Information
i. - You can access Airport Information in many ways. For this tutorial, we are going to access airport information by simply selecting the airport on the map. In this example, we will click on Kissimmee Gateway (KISM) from the map view. This will bring up the airport information.
B. - Using Airport Information to add an airport to your route.
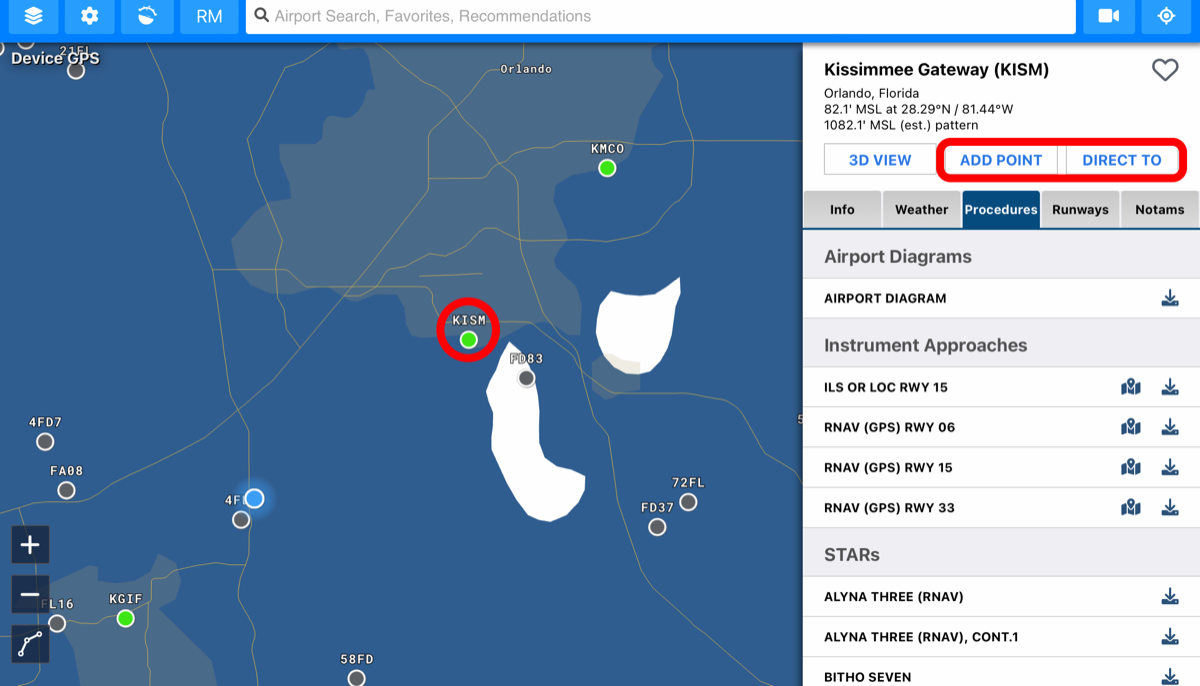
i. - At the top of the Airport Information modal, you will see an ADD POINT button. Clicking this will add the airport to the end of your current route. If no route exists, it will become the starting point of your route. Alternatively, clicking the DIRECT TO button will create a route from your current GPS location to the airport you have selected. Using the DIRECT TO button will replace any current route you have already entered into the route manager.
4. - Entering a route using the Map Information Modal
A. - Accessing the Map Information Modal
i. - To access the Map Information Modal, on the map screen, click and hold on or near an airport for at least 1 second.
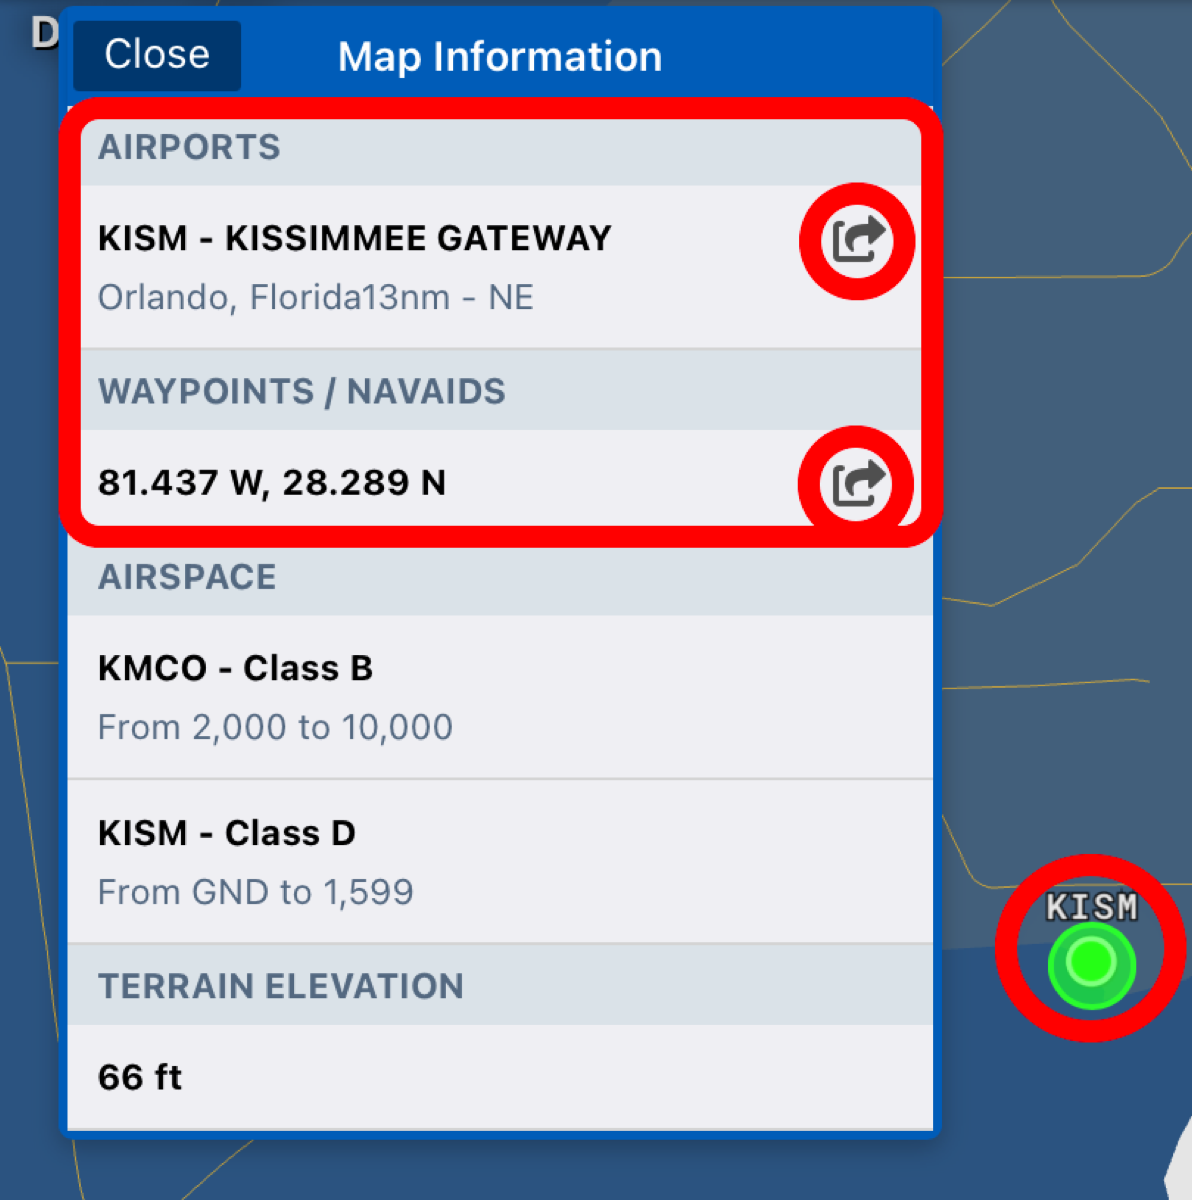
ii. - The Map Information Modal will show you Airports and Waypoint in proximity to where you force touch. To add them to your Route Manager, simply press the export button to the right of the location you would like to add.
5. - Adding a waypoint to a route using force touch on a route
A. - How to use force touch to add a waypoint to your route.
i. - Once a route is established and a route line is formed, you can use the rubber banding effect by force touching anywhere along the route and dragging it to a point on the map that you would like to add to your route.
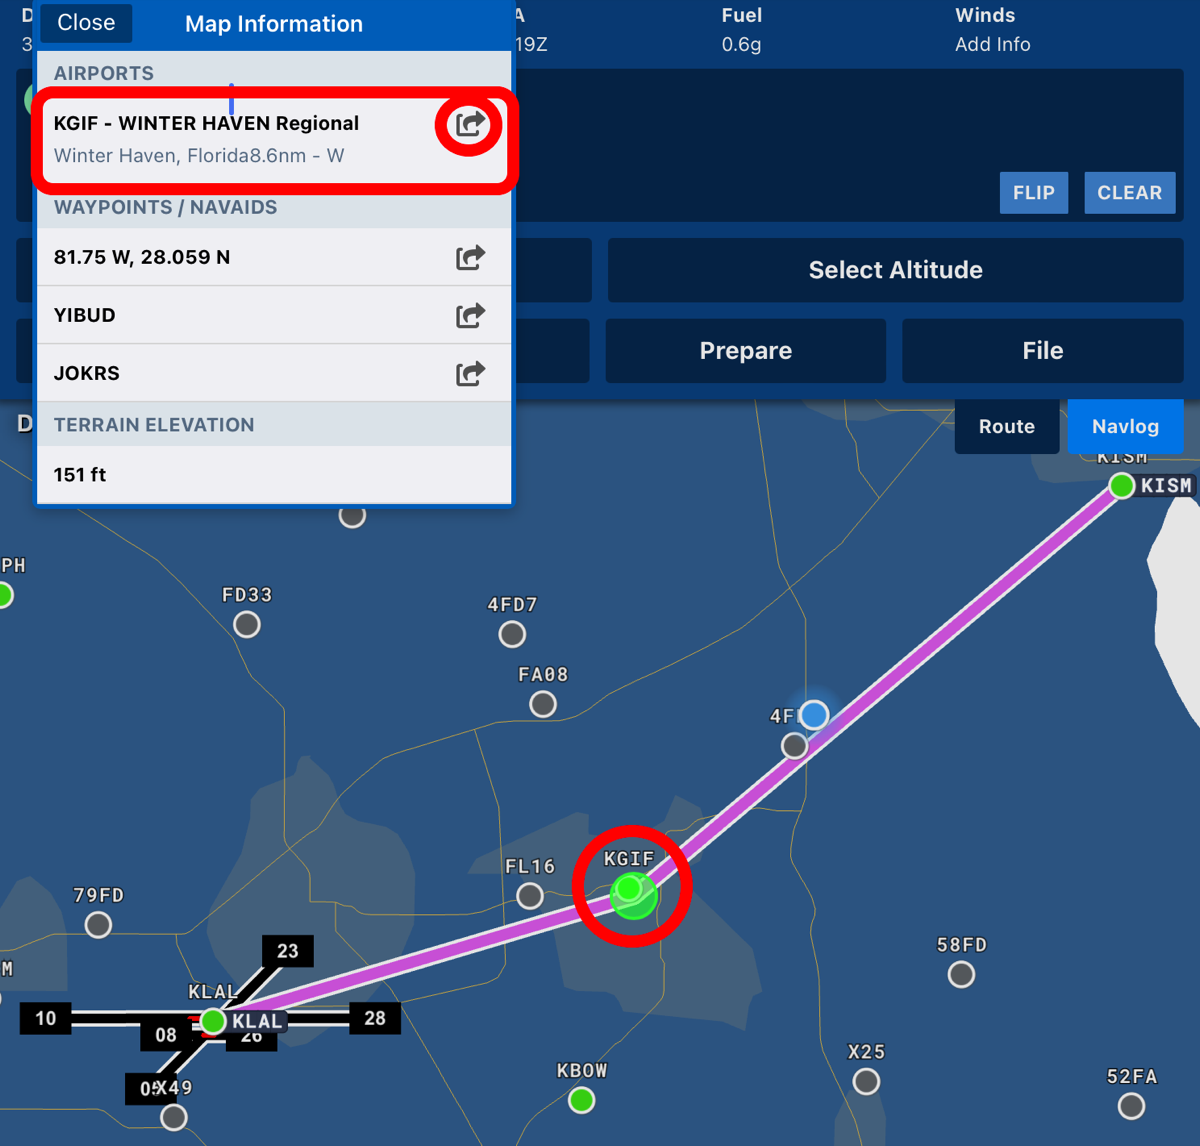
ii. - In the example above, we force touch the route line and dragged it to KGIF. By doing this, this will bring up the Map Information modal. To add KGIF to your route, press the export button next to the KGIF results. This will add it to your route and inside of the route manager.